Anime to Realistic: Converting 2D to Lifelike
Introduction
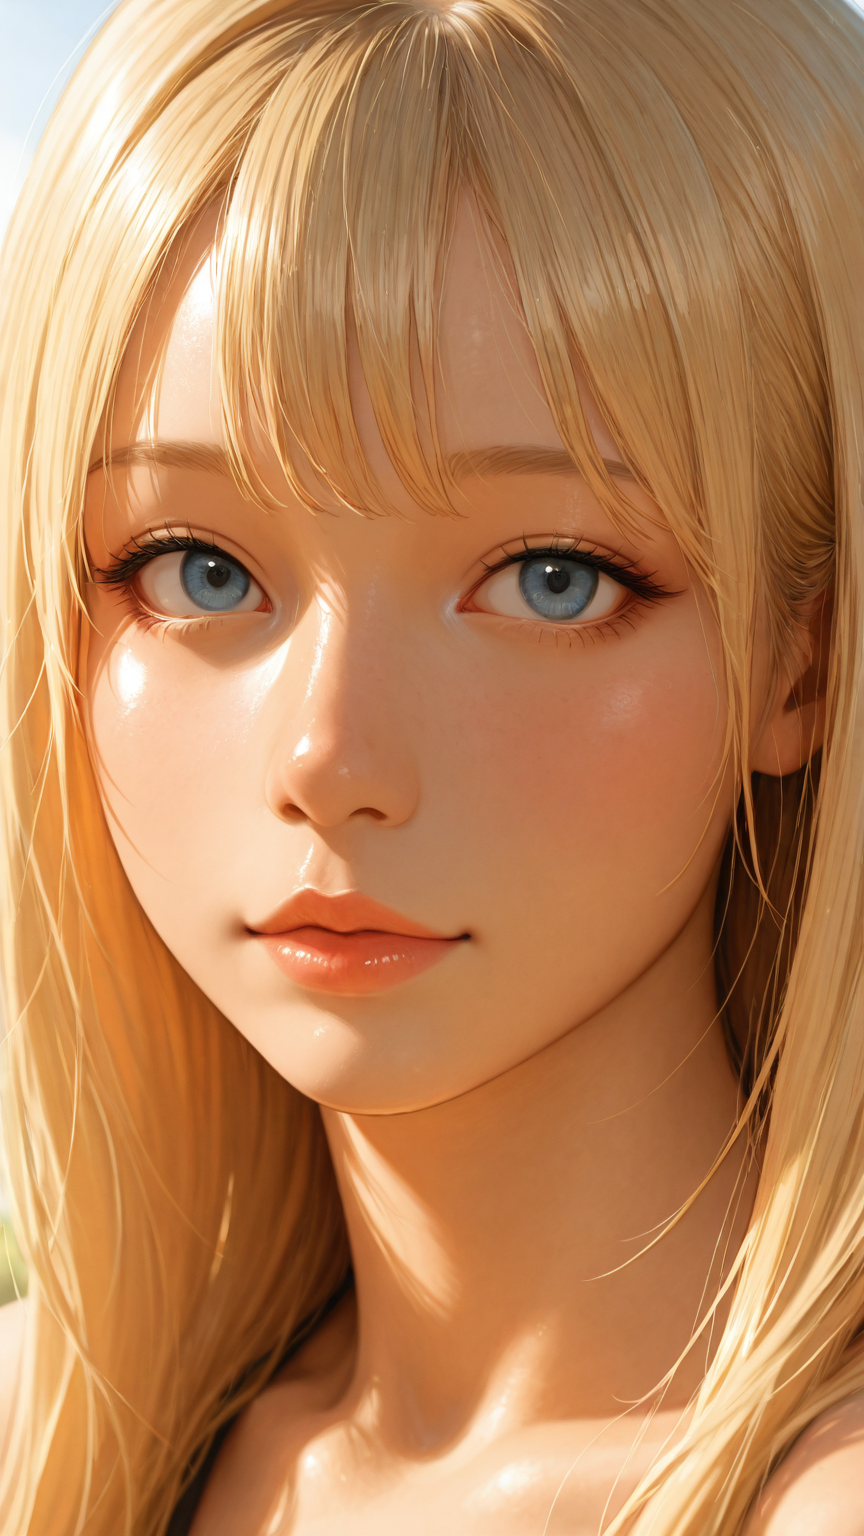
The first time I converted my anime OC to a realistic portrait, it was… unsettling. But also kind of amazing? Like seeing a cartoon character step into the real world. There’s this uncanny moment where you recognize the character — the hair, the pose, the expression — but now they look like an actual person.
I tried this back in the SD 1.5 days and the results were so cursed I sealed them away and never spoke of them again. Seriously, nightmare fuel. But now with modern SDXL models and ComfyUI, I decided to give it another shot. And this time? Actually good results. The technology has come a long way.
Let me show you how to take an anime character and convert them into a realistic portrait while keeping their identity intact — or at least recognizable.
Why Convert Between Styles?
Before we get into the technical stuff, let’s talk about why you’d want to do this.
Maybe you’ve got a character design you love in anime style but you’re curious what they’d look like as a real person. Maybe you’re working on a project that needs both stylized and realistic versions of the same character. Or maybe — and this is probably the most common reason — you just think it’s cool. Because it is.
For AI companion platforms, this is actually a huge deal. Many users prefer anime aesthetics, while others want photorealistic companions. Being able to convert between styles means a single character can work for both audiences. Same personality, same identity, different visual presentation. It’s like having a character who can exist in both a manga and a live-action adaptation.
The Technical Approach: Checkpoint Swapping + IPAdapter
Here’s the core idea: you generate a base anime image with an anime-focused checkpoint, then use a combination of checkpoint swapping and IPAdapter to transform the style to realistic while maintaining the character’s core features.
The workflow uses four checkpoints — one anime base and three realistic options to compare:
The Base: WAI-NSFW-v16 (Illustrious)
This is your anime starting point. Generate a solid base image here with a fixed seed. Lock everything down — prompt, seed, dimensions. You want this to be completely consistent because it’s your “ground truth” character. Everything else builds from this.
The Realistic Checkpoints
Here’s where it gets interesting. I tested three different realistic checkpoints to see how each one interprets the same anime source:
-
Nova Reality XL — Produces a semi-realistic result. Not fully photographic, more like that sweet spot between illustration and reality. The faces tend toward a more Western appearance. If you want “realistic but still a little stylized,” this is your pick.
-
UwazumiMix_ILL — This one surprised me. It produced gorgeous results — clean features, natural-looking skin, beautiful hair rendering. The “stew pot” mixing approach in this checkpoint (they literally describe it as “throwing ingredients in a pot and simmering”) somehow produces really cohesive realistic conversions.
-
winpicAsianRealism — The most balanced results in my testing. This checkpoint excels at Asian-featured realistic portraits, and it maintained the best character identity across the conversion. The anime original and the realistic output actually looked like they could be the same person.
Step-by-Step Workflow
Here’s how to set this up in ComfyUI:
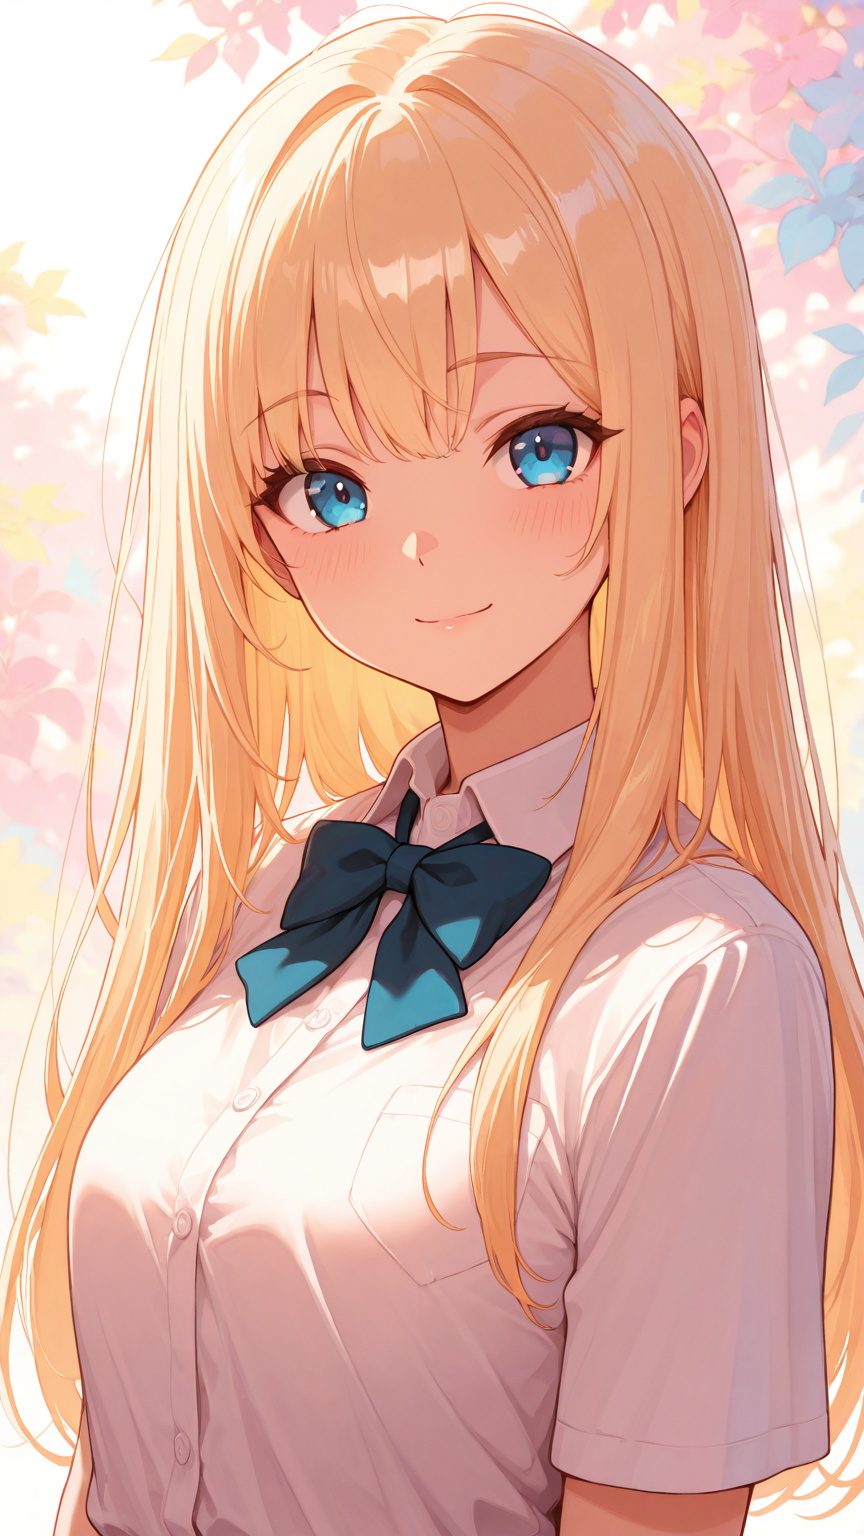
Step 1: Generate Your Base Anime Image
Use your anime checkpoint (WAI-NSFW or similar) to create a clean base image. Focus on:
- Clear character features (face, hair, distinctive details)
- Good composition (head and shoulders works best for portraits)
- A fixed seed you can reproduce
This base image is your “character sheet.” Everything flows from here.
Step 2: Set Up the Conversion Pipeline
The conversion uses IPAdapter to condition the realistic checkpoint with your anime base image. Here’s the node setup:
- Load your base anime image as the IPAdapter reference
- Switch the checkpoint to one of the realistic models
- Load IPAdapter with CLIP Vision model
- Connect IPAdapter Advanced to condition the KSampler
The key insight: you’re using the anime image as a style and identity reference while the realistic checkpoint handles the actual rendering. IPAdapter transfers the character’s visual identity — the pose, the features, the composition — while the new checkpoint reinterprets everything in a realistic style.
Step 3: The Prompt + LoRA Approach (Alternative)
I also tested a fourth approach: keeping the original anime checkpoint but adding realistic prompts and a realism LoRA (RealSkin_xxXL) to push the style. Here’s the prompt I used:
(realistic, photorealistic,:1.6) photo, real,
skin texture, pores, subsurface scattering,
detailed skin, soft lighting, depth of field,
raw photo, film grain
Fair warning: even cranking the RealSkin LoRA to a weight of 10, the anime checkpoint still doesn’t go fully realistic. It produces an interesting hybrid — the character gains more realistic textures and lighting but stays fundamentally anime-styled. Push the LoRA to 50 and you get… well, let’s just say the character moves to an alternate dimension. Not recommended unless you’re feeling adventurous.
The checkpoint swap approach consistently beats the prompt-only approach for actual style conversion. Prompts and LoRA combinations can nudge the style, but swapping the underlying model is what truly changes the rendering paradigm.
Maintaining Character Identity
This is the tricky part. When you convert styles, you want people to look at both images and go “oh, that’s the same character.” Here’s what I learned about keeping identity consistent:
Hair is the strongest anchor. Hair color, style, and length transfer the most reliably between anime and realistic. If your character has distinctive hair, it’ll carry through the conversion nicely.
Eyes change the most. Anime eyes are huge and expressive; realistic eyes are proportionally much smaller. This is the single biggest source of “that doesn’t look like the same character” reactions. Accept that the eyes will change dramatically and focus on other features for identity matching.
Pose and composition transfer well. The overall body position, angle, and framing come through IPAdapter strongly. Maintain the same pose across both styles and the identity connection feels much stronger.
Skin tone can shift. Depending on the realistic checkpoint, skin tones may shift significantly. winpicAsianRealism maintained the closest skin tone match in my tests, while Nova Reality XL tended to shift toward lighter, more Western-appearing tones.
Common Artifacts and Fixes
Let’s be real — this process doesn’t always produce clean results on the first try. Here are the issues I ran into and how I fixed them:
“Uncanny valley” faces: The conversion sometimes produces faces that are almost realistic but something feels off. Usually it’s the eyes or mouth. Fix: use a face detailer (like ADETAILER) as a post-processing step. It regenerates just the face at higher detail and often fixes the uncanny feeling.
Style bleeding / hybrid look: Sometimes you get a weird half-anime, half-realistic result where the hair is realistic but the eyes are still anime-sized. Fix: increase the IPAdapter weight or adjust the start/end timing. Earlier application (start_at: 0) helps the realistic checkpoint take full control of the style.
Loss of character details: Small details like accessories, clothing patterns, or specific features can get lost in the conversion. Fix: use img2img at a lower denoise (0.4–0.6) instead of full txt2img for the realistic pass. This preserves more structural detail from the original.
Color palette shifts: The realistic version might have completely different coloring than the anime original. Fix: this is partially expected (realistic images have different color dynamics), but if it’s too dramatic, try adjusting the IPAdapter weight or using a color-correcting post-processing step.
How This Powers AI Companion Platforms
This anime-to-realistic conversion technology is directly behind one of the most requested features on AI companion platforms: style switching.
When a platform lets you toggle your companion between “anime” and “realistic” modes — and the character is still recognizably the same person — they’re using techniques very similar to what we’ve covered here. The checkpoint swap + IPAdapter pipeline is the foundation that makes this possible.
Platforms like YUKIKO.AI and others in the AI companion space offer this kind of style flexibility. Some let users set a preference for anime or realistic as their default rendering style, while others offer on-the-fly switching. The underlying technology is the same: maintaining character identity across fundamentally different artistic styles.
This also connects to the broader 3DCG rendering pipeline used by many companion platforms — for more context on how these visual systems work together, check out the tech behind AI companion visuals.
The ability to bridge anime and realistic aesthetics means platforms can serve a much wider audience. An anime fan and a photorealism enthusiast can both enjoy the same companion character. That’s powerful for personalization and it’s only possible because the underlying technology has gotten good enough to maintain identity across style boundaries.
Credits & Source
This guide is adapted from nobin’s original Japanese articles on note.com/nobinlog. We’ve translated and recreated his workflows to share these techniques with an English-speaking audience. His hands-on comparison of four different conversion approaches — from LoRA-only to multiple checkpoint swaps — gives a practical framework for anyone wanting to bridge anime and realistic styles.
Check out his original post for the full comparison results and downloadable workflow:
- 過去にアニメキャラをリアル系にするをComfyUIで実施してみた — Anime-to-realistic conversion with four checkpoint comparison