3 Steps to Original Character Creation with Illustrious
Introduction
Step 1 is deceptively simple. You’re basically writing a character sheet, except the model actually reads it.
The Illustrious model family changed the game for character creation in AI image generation. Before Illustrious, getting a specific character to look right required heavy LoRA training or endless prompt wrestling. With Illustrious, the model’s tag understanding is so strong that you can describe a character in detail and get something recognizable on the first try.
I’ve been working through nobin’s experiments with dozens of Illustrious checkpoints, and the character creation workflow boils down to three steps. They’re not complicated — the magic is in understanding what each step actually does and why it matters.
What Makes Illustrious Special for Character Work
Before diving into the process, it helps to understand why Illustrious is different from what came before.
Strong tag understanding. Illustrious models are fine-tuned from SDXL with a focus on anime-native training data. This means character tags — the descriptive labels like blue_eyes, long_hair, school_uniform — actually work the way you’d expect. In older models like Pony, tag response was inconsistent. Some characters would appear, others wouldn’t, and mixing two characters in one image was a gamble. Illustrious checkpoints respond to character tags reliably, which is the foundation everything else builds on.
Multi-character support. Because characters are defined through tags rather than LoRAs, you can generate two or more characters in the same image without them blending into each other. LoRA-based multi-character generation often results in feature mixing — one character’s hair color bleeding into the other, or faces becoming an average of both. Tag-based generation avoids this.
Better anatomy. Illustrious models handle hands, feet, and complex poses noticeably better than their predecessors. This matters for character creation because you want your character to look good in different poses and situations, not just in one lucky generation.
Step 1: Define Character Traits via Tags
This is where you write your character into existence. Think of it as creating a character sheet for the AI.
Start with the basics:
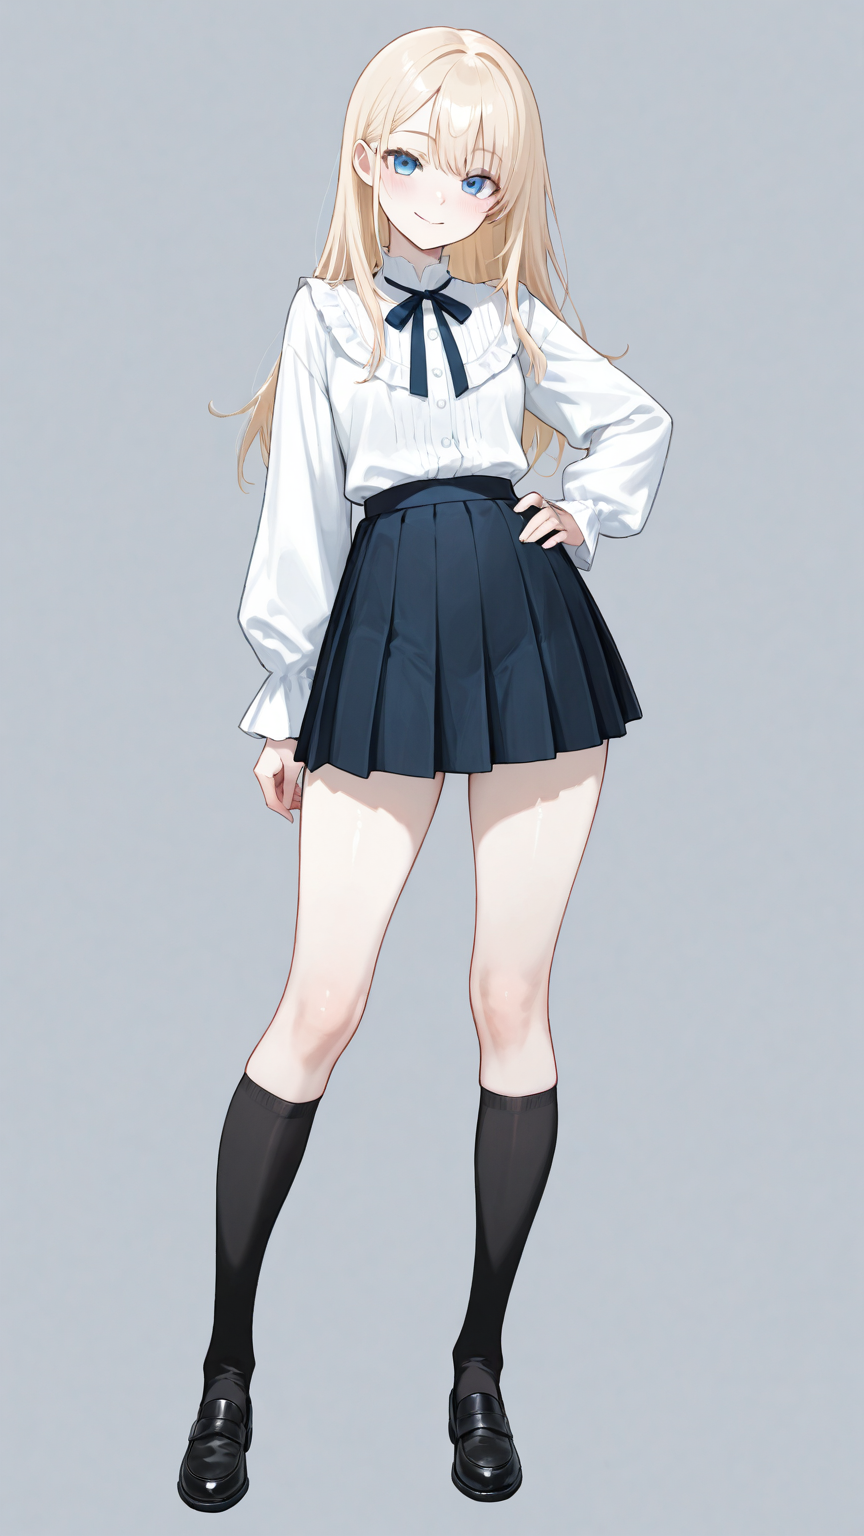
- Physical features:
1girl, blue_eyes, long_blonde_hair, pale_skin, slender - Clothing:
white_blouse, pleated_skirt, knee_high_socks - Expression/mood:
gentle_smile, looking_at_viewer - Pose:
standing, hand_on_hip
The key insight from nobin’s testing: Illustrious models respond to layered specificity. Don’t just say blue_eyes — say bright_blue_eyes or deep_blue_eyes. Don’t just say long_hair — specify waist_length_hair or hair_over_one_eye. The more specific you get, the more distinct the result becomes.
What to avoid: Contradictory tags. If you specify both short_hair and ponytail, the model will try to satisfy both and you’ll get something weird. Be deliberate about what you include and what you leave out.
Choosing your checkpoint matters here. Not all Illustrious checkpoints handle tags the same way. From nobin’s extensive comparisons across over 20 checkpoints:
- Hassaku XL Illustrious — Strong on expressive poses and dynamic compositions
- Obsession Illustrious — High overall quality with excellent detail rendering
- Nova Anime XL — Generates beautiful backgrounds automatically, great for scene-based character work
- CherryMIX XL — Clean hand rendering and high baseline quality
- Sweet Mix — Good balance of quality across different character types
Each checkpoint has a slightly different “personality.” The same prompt will produce noticeably different results across checkpoints, so it’s worth testing your character description in two or three before committing to one.
Step 2: Refine with Targeted LoRAs
Once you have a base character that looks close to what you want, LoRAs let you push specific aspects further.
Style LoRAs change the overall artistic feel. Maybe your base generation looks good but you want a more painterly look, or a specific anime studio’s style. A style LoRA applied at 0.5–0.7 weight can transform the aesthetic without losing the character’s core features.
Concept LoRAs add specific visual elements the base model might not handle well. Unusual clothing designs, specific accessories, unique hairstyles — if the base tags aren’t getting you close enough, a concept LoRA can close the gap.
The important thing about LoRAs with Illustrious: Because the model’s tag understanding is already strong, you often need less LoRA influence than you would with other model families. A LoRA weight of 0.3–0.5 is often enough. Going higher risks overpowering the character traits you defined in Step 1.
nobin’s approach: Use LoRAs as seasoning, not the main ingredient. Your character’s identity should come from the tags. LoRAs should enhance, not define. For detailed recipes on combining multiple LoRAs for unique styles, check out our LoRA combination recipes guide.
Step 3: Iterate with img2img for Consistency
Here’s where the character goes from “a good generation” to “my character.”
Once you have a generation you like, use it as the starting point for img2img refinement. This is the same chase sampler technique covered in our img2img guide — load the image back into a KSampler and run additional passes.
For consistency across multiple images:
- Save your winning generation as the reference image
- Keep your prompt and LoRA configuration — always include them when re-sampling so the character’s features stay anchored
- Use low denoise (0.25–0.45) for variations that maintain the character’s identity while changing pose, expression, or scene
- Use FaceDetailer as a final pass to ensure the face remains sharp and recognizable across variations
For creating a character reference sheet:
Generate your character in several standard poses — front-facing, three-quarter view, side profile — using the same prompt and seed variations. Run each through a chase sampler with the original prompt to maintain consistency. The result is a set of images that clearly depict the same character from different angles.
The iteration loop: Generate → pick the best → refine with img2img → generate variations → pick the best → refine again. Each cycle gets you closer to a character that feels intentional rather than random.
Tips for Making Characters Feel Unique
After testing dozens of checkpoints and hundreds of generations, here’s what separates a memorable character from a generic one:
Give them an asymmetry. Perfect symmetry reads as “AI-generated.” A strand of hair falling differently on one side, a slightly tilted head, one eye partially covered — these imperfections make a character feel designed rather than default. For more techniques on breaking out of generic AI faces, see our guide on overcoming default face syndrome.
Anchor with one strong feature. The most memorable characters have one standout visual element. Maybe it’s an unusual eye color, a distinctive accessory, or a specific way they wear their clothes. Build your tag list around that anchor.
Test across different scenes. A character that only looks good in one pose isn’t a character — it’s a lucky generation. Run your character through different scenarios (indoor, outdoor, different lighting) to make sure the design holds up. To generate variations at scale, wildcard systems can automate batch creation of your character in hundreds of different poses and settings.
Don’t fight the checkpoint’s personality. Each checkpoint has strengths. If Nova Anime XL keeps generating beautiful backgrounds, lean into it and make your character a “scene character.” If Hassaku gives you dynamic poses, build a character that looks best in action.
How This Connects to AI Companion Platforms
This three-step process — define traits, refine with styles, iterate for consistency — is essentially the same pipeline that AI companion platforms use when you customize your companion’s appearance.
When you pick your companion’s hair color, eye color, and style on platforms like Candy.AI or YUKIKO.AI, you’re doing Step 1 — defining character traits through tags. The platform’s backend likely uses curated style LoRAs (Step 2) to ensure a consistent visual quality. And when the platform generates multiple images of “your” companion and they all look like the same person, that’s Step 3 — iterative refinement for consistency.
Platforms that do this well deliver a companion that feels personal and recognizable. Platforms that don’t will give you a companion whose appearance shifts noticeably between images — the visual equivalent of talking to a different person each time. Understanding this pipeline helps you appreciate which platforms are investing in character consistency and which are cutting corners.
For more on the model types involved in this pipeline, see our guide to ComfyUI model types.
Credits & Source
This guide is adapted from nobin’s original Japanese articles on note.com/nobinlog. nobin spent weeks testing over 20 Illustrious-based checkpoints, comparing their character generation capabilities side by side — the kind of systematic testing that saves the rest of us enormous amounts of time.
Check out his original posts for the full visual comparisons: